INSTALL FREE SSL FROM CLOUDFLARE
Recently, the intermediary proxy service CloudFlare has launched a free SSL campaign so that everyone can use an SSL certificate to add HTTPS protocol to the website to make it safer and more SEO-friendly.
And for CloudFlare they have overcome these 2 problems because almost we do not have to install anything on the host or server but just use the CloudFlare service to be able to activate the SSL protocol.
Preview: How to install CloudFlare for your website
THINGS TO KNOW BEFORE USING SSL
When using SSL, your website will use HTTPS protocol with a link with a blue padlock.
Website will load slower if Full SSL is installed, because it has to encrypt when receiving / sending data.
If using Full SSL, when switching hosts, you have to reinstall it.
CLOUDFLARE SSL TYPES DETAILS
While choosing SSL, you can see that in addition to the Flexible type, CloudFlare also has many different types, what it means, I would like to explain as follows:
Flexible SSL : This type of CloudFlare will support visitors to your website via HTTPS protocol, but the data sent from CloudFlare to the server will not be encrypted. And you don't need to install SSL certificate inside the server. You can use any website, from a Shared Host to a private server, and no additional setup is required.
Full SSL : This type of CloudFlare will support visitors to the website via HTTPS protocol and the data from CloudFlare sent to the server will also be encrypted. However, you must have an SSL certificate, but CloudFlare will not validate this certificate so you can use a self-signed certificate, or create a CloudFlare certificate. And your account must be a Pro account to use a private certificate on CloudFlare.
Full SSL (strict) : Same as Full SSL but CloudFlare will validate this certificate, your certificate must buy or use Let's Encrypt. And your account must be Pro to use the private certificate.
Below I will detail how to use each type.
ENABLE FLEXIBLE SSL
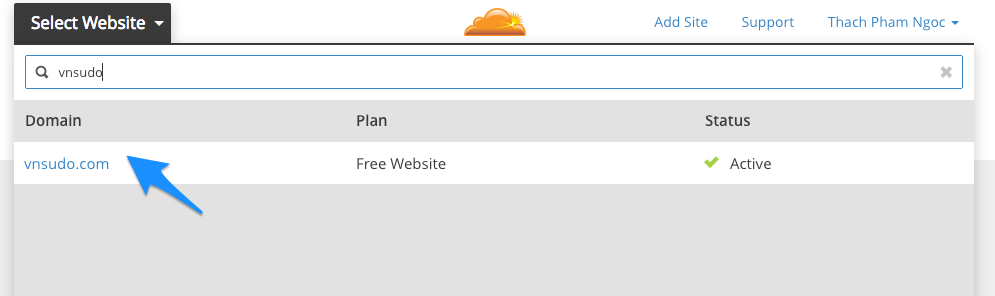
First you need to install CloudFlare to your website . Then visit the website that needs to activate SSL.
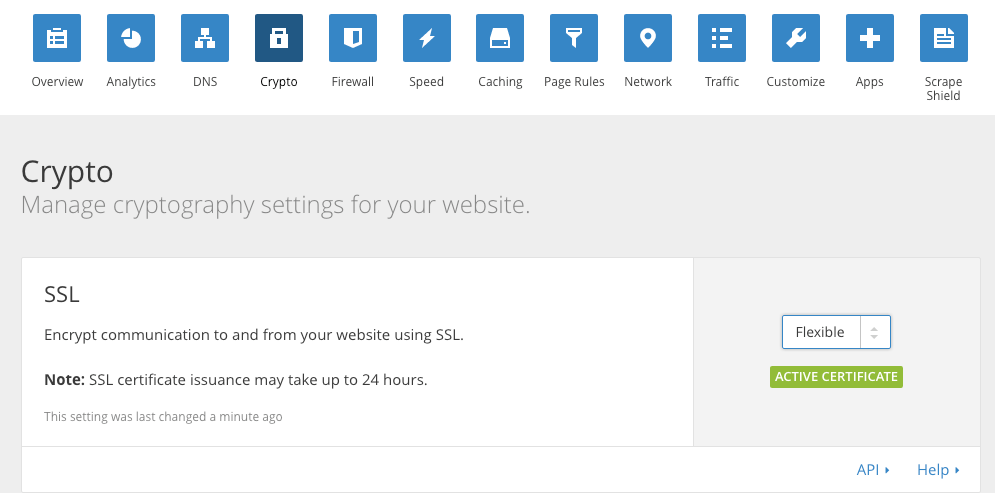
In the Crypto section, find the SSL section and select Flexible SSL.
Now you can wait about 30 minutes and access the website according to the protocol https://domain.com .
INSTALL FULL SSL USING CLOUDFLARE'S CERTIFICATE
You can install Full SSL so that the data you send to CloudFlare or from CloudFlare is encrypted more securely. In this article, I will not mention how to use SSL with a private certificate, but use a certificate issued by CloudFlare, still good.
Step 1. Choose SSL Type
In the Crypto section, select Full SSL or Full SSL (strict).
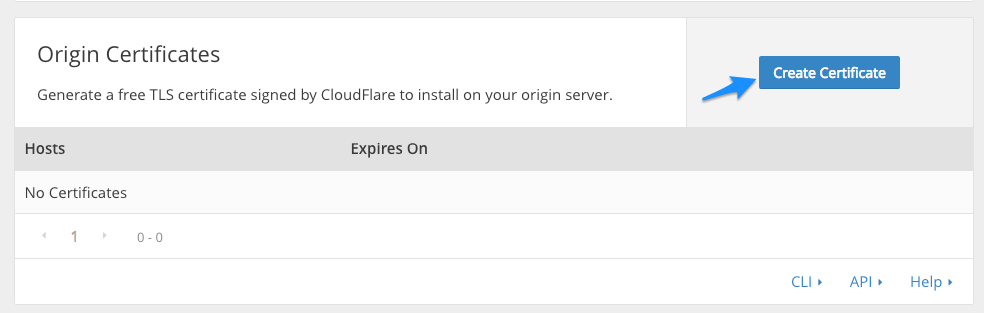
Step 2. Generate SSL Certificate on CloudFlare
In the Crypto section, scroll down to the Origin Certificates section and click the Create Certificate button.
Then select Let CloudFlare generate a private key and a CSR and then click Next.
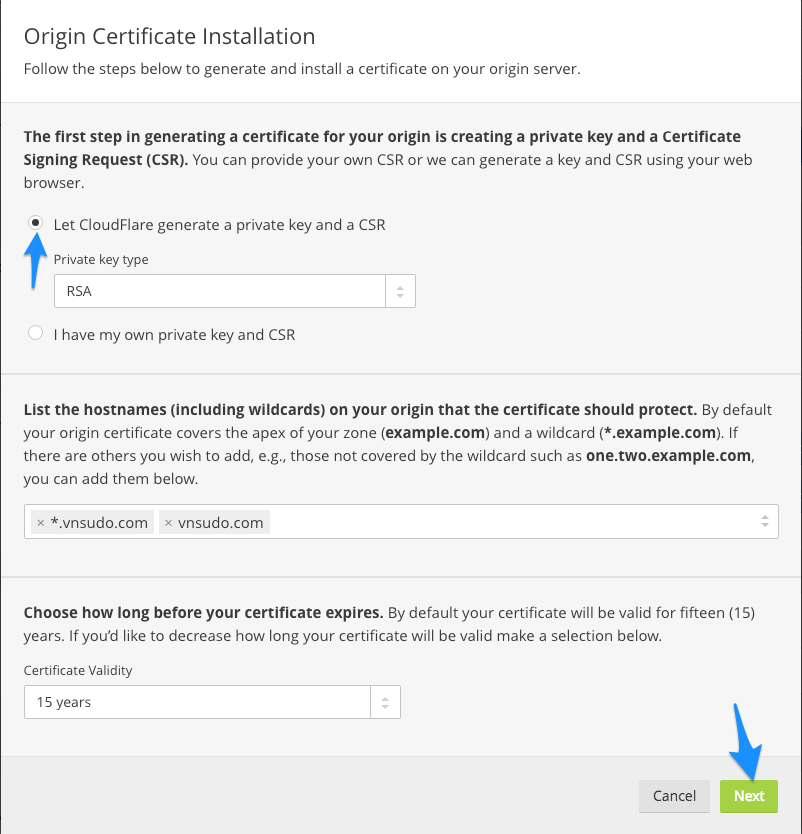
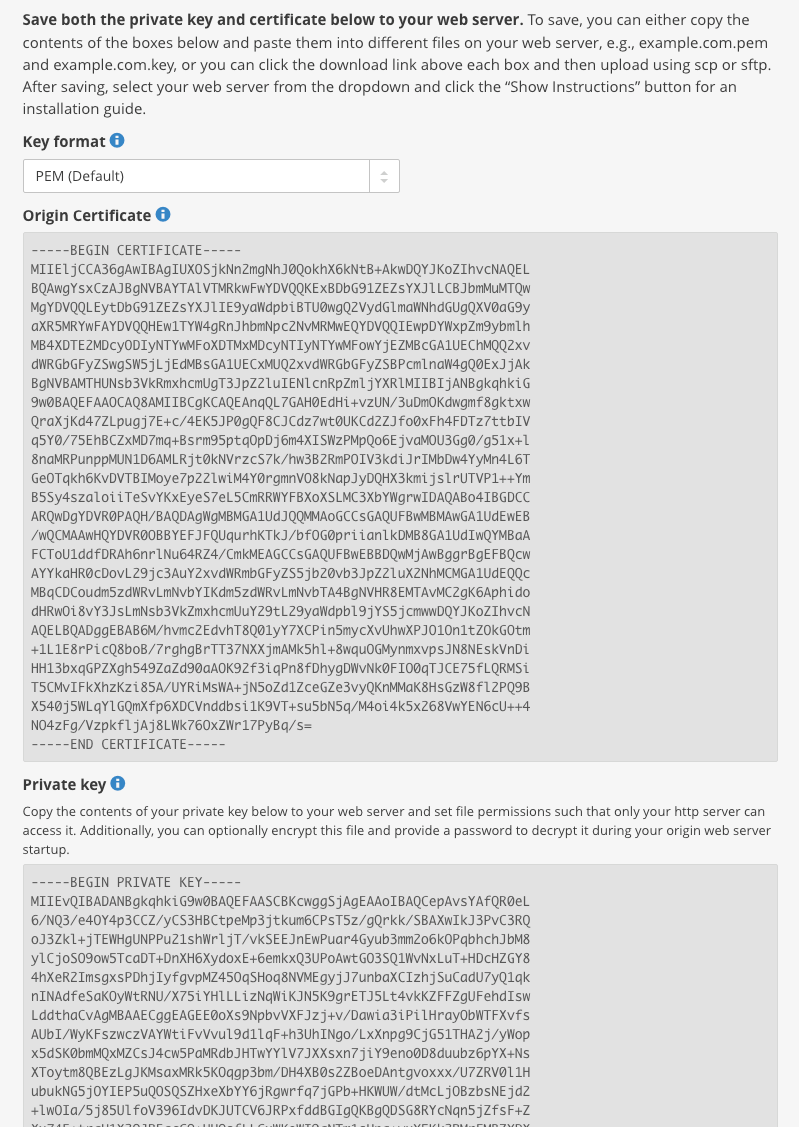
At the end they will give you two important information, Origin Certificate and Private Key . Please copy these two information somewhere to use in the next step, especially the Private Key you have to save because you cannot find the Private Key again after pressing the Ok button.
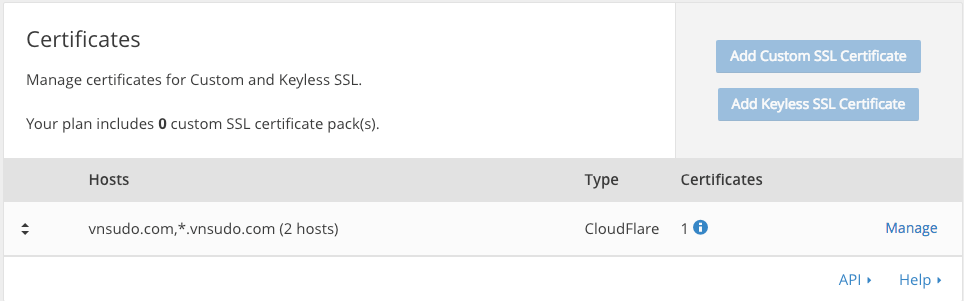
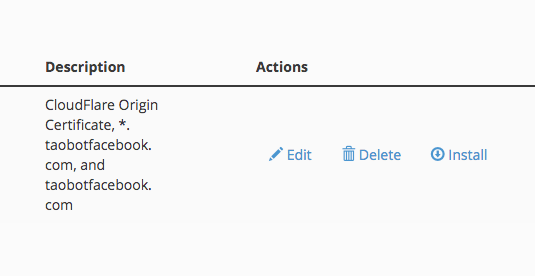
When you have finished installing, wait until CloudFlare approves your certificate, it will display in the Certificates section as shown below. This process can take a few minutes or a few hours.
Step 3. Install the certificate on the webserver
Please select the type of webserver or control panel you are using for the correct installation.
[accordion]
[acc title="cPanel"]
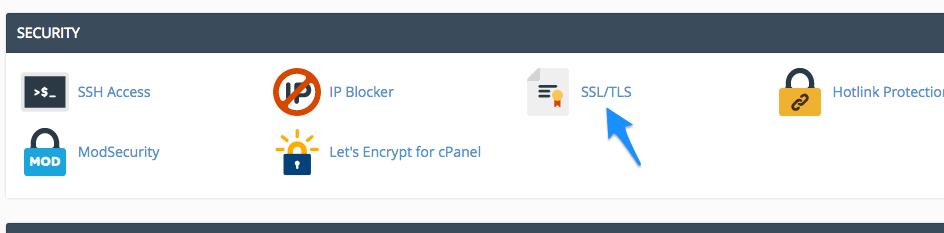
First, make sure your cPanel host supports SSL settings. If so, you'll find the SSL/TLS section in cPanel.
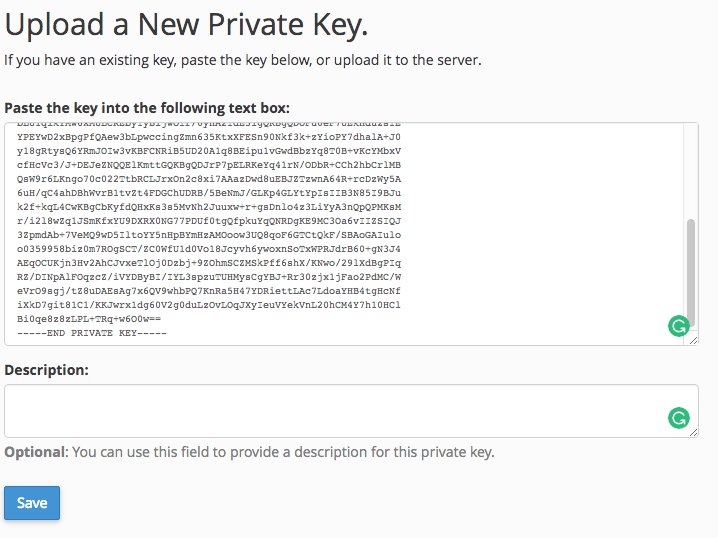
You go there find the Private Keys (KEY) section and proceed to paste the Private key content on CloudFlare into the Upload a new private key section and click Save.
Continue to return to the previous page, find the Certificates (CRT) section and paste the Origin Certificate content on CloudFlare into the Upload a New Certificate section and click Save Certificate.
After adding, go back to the Certificate management page and click the Install button on the newly added certificate.

And enter the content below into the Certificate Authority Bundle: (CABUNDLE) section and press the Install Certificate button .
-----BEGIN CERTIFICATE-----
MIID/DCCAuagAwIBAgIID+rOSdTGfGcwCwYJKoZIhvcNAQELMIGLMQswCQYDVQQG
EwJVUzEZMBcGA1UEChMQQ2xvdWRGbGFyZSwgSW5jLjE0MDIGA1UECxMrQ2xvdWRG
bGFyZSBPcmlnaW4gU1NMIENlcnRpZmljYXRlIEF1dGhvcml0eTEWMBQGA1UEBxMN
U2FuIEZyYW5jaXNjbzETMBEGA1UECBMKQ2FsaWZvcm5pYTAeFw0xNDExMTMyMDM4
NTBaFw0xOTExMTQwMTQzNTBaMIGLMQswCQYDVQQGEwJVUzEZMBcGA1UEChMQQ2xv
dWRGbGFyZSwgSW5jLjE0MDIGA1UECxMrQ2xvdWRGbGFyZSBPcmlnaW4gU1NMIENl
cnRpZmljYXRlIEF1dGhvcml0eTEWMBQGA1UEBxMNU2FuIEZyYW5jaXNjbzETMBEG
A1UECBMKQ2FsaWZvcm5pYTCCASIwDQYJKoZIhvcNAQEBBQADggEPADCCAQoCggEB
AMBIlWf1KEKR5hbB75OYrAcUXobpD/AxvSYRXr91mbRu+lqE7YbyyRUShQh15lem
ef+umeEtPZoLFLhcLyczJxOhI+siLGDQm/a/UDkWvAXYa5DZ+pHU5ct5nZ8pGzqJ
p8G1Hy5RMVYDXZT9F6EaHjMG0OFFH6Ih25TtgfyyrjXycwDH0u6GXt+G/rywcqz
/9W4Aki3XNQMUHNQAtBLEEIYHMkyTYJxuL2tXO6ID5cCsoWw8meHufTeZW2DyUpl
yP3AHt4149RQSyWZMJ6AyntL9d8Xhfpxd9rJkh9Kge2iV9rQTFuE1rRT5s7OSJcK
xUsklgHcGHYMcNfNMilNHb8CAwEAAaNmMGQwDgYDVR0PAQH/BAQDAgAGMBIGA1Ud
EwEB/wQIMAYBAf8CAQIwHQYDVR0OBBYEFCToU1ddfDRAh6nrlNu64RZ4/CmkMB8G
A1UdIwQYMBaAFCToU1ddfDRAh6nrlNu64RZ4/CmkMAsGCSqGSIb3DQEBCwOCAQEA
cQDBVAoRrhhsGegsSFsv1w8v27zzHKaJNv6ffLGIRvXK8VKKK0gKXh2zQtN9SnaD
gYNe7Pr4C3I8ooYKRJJWLsmEHdGdnYYmj0OJfGrfQf6MLIc/11bQhLepZTxdhFYh
QGgDl6gRmb8aDwk7Q92BPvek5nMzaWlP82ixavvYI+okoSY8pwdcVKobx6rWzMWz
ZEC9M6H3F0dDYE23XcCFIdgNSAmmGyXPBstOe0aAJXwJTxOEPn36VWr0PKIQJy5Y
4o1wpMpqCOIwWc8J9REV/REzN6Z1LXImdUgXIXOwrz56gKUJzPejtBQyIGj0mveX
Fu6q54beR89jDc+oABmOgg==
-----END CERTIFICATE-----
Or you can refer to CloudFlare Origin CA — RSA Root here .
Once installed, it will display something like this:
You can now access the website via https protocol if CloudFlare has approved your certificate.
[/acc]
[acc title="VestaCP"]
You go to edit the domain you need to install SSL on and select SSL Support.
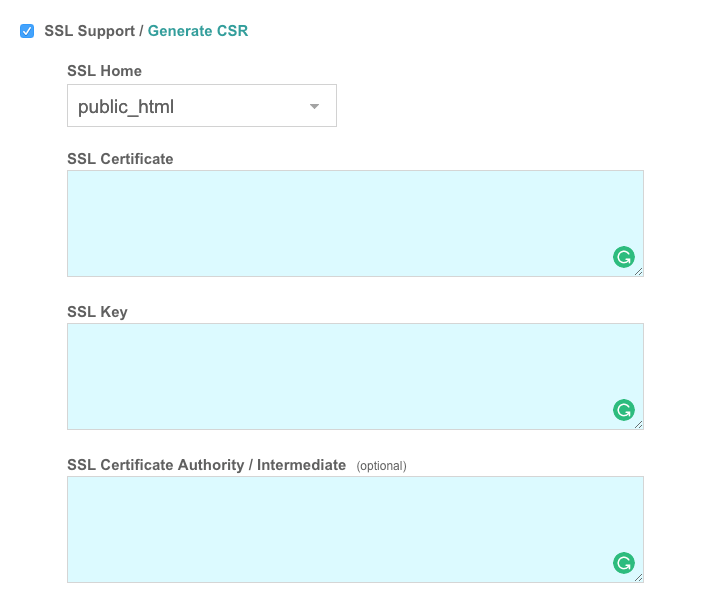
Then you fill in the information in the corresponding boxes as follows:
SSL Certificate : Paste the content of the Origin Certificate section on CloudFlare.
SSL Key : Paste the Private Key on CloudFlare in.
SSL Certificate Authority / Intermediate : Paste the following content in:
-----BEGIN CERTIFICATE-----
MIID/DCCAuagAwIBAgIID+rOSdTGfGcwCwYJKoZIhvcNAQELMIGLMQswCQYDVQQG
EwJVUzEZMBcGA1UEChMQQ2xvdWRGbGFyZSwgSW5jLjE0MDIGA1UECxMrQ2xvdWRG
bGFyZSBPcmlnaW4gU1NMIENlcnRpZmljYXRlIEF1dGhvcml0eTEWMBQGA1UEBxMN
U2FuIEZyYW5jaXNjbzETMBEGA1UECBMKQ2FsaWZvcm5pYTAeFw0xNDExMTMyMDM4
NTBaFw0xOTExMTQwMTQzNTBaMIGLMQswCQYDVQQGEwJVUzEZMBcGA1UEChMQQ2xv
dWRGbGFyZSwgSW5jLjE0MDIGA1UECxMrQ2xvdWRGbGFyZSBPcmlnaW4gU1NMIENl
cnRpZmljYXRlIEF1dGhvcml0eTEWMBQGA1UEBxMNU2FuIEZyYW5jaXNjbzETMBEG
A1UECBMKQ2FsaWZvcm5pYTCCASIwDQYJKoZIhvcNAQEBBQADggEPADCCAQoCggEB
AMBIlWf1KEKR5hbB75OYrAcUXobpD/AxvSYRXr91mbRu+lqE7YbyyRUShQh15lem
ef+umeEtPZoLFLhcLyczJxOhI+siLGDQm/a/UDkWvAXYa5DZ+pHU5ct5nZ8pGzqJ
p8G1Hy5RMVYDXZT9F6EaHjMG0OFFH6Ih25TtgfyyrjXycwDH0u6GXt+G/rywcqz
/9W4Aki3XNQMUHNQAtBLEEIYHMkyTYJxuL2tXO6ID5cCsoWw8meHufTeZW2DyUpl
yP3AHt4149RQSyWZMJ6AyntL9d8Xhfpxd9rJkh9Kge2iV9rQTFuE1rRT5s7OSJcK
xUsklgHcGHYMcNfNMilNHb8CAwEAAaNmMGQwDgYDVR0PAQH/BAQDAgAGMBIGA1Ud
EwEB/wQIMAYBAf8CAQIwHQYDVR0OBBYEFCToU1ddfDRAh6nrlNu64RZ4/CmkMB8G
A1UdIwQYMBaAFCToU1ddfDRAh6nrlNu64RZ4/CmkMAsGCSqGSIb3DQEBCwOCAQEA
cQDBVAoRrhhsGegsSFsv1w8v27zzHKaJNv6ffLGIRvXK8VKKK0gKXh2zQtN9SnaD
gYNe7Pr4C3I8ooYKRJJWLsmEHdGdnYYmj0OJfGrfQf6MLIc/11bQhLepZTxdhFYh
QGgDl6gRmb8aDwk7Q92BPvek5nMzaWlP82ixavvYI+okoSY8pwdcVKobx6rWzMWz
ZEC9M6H3F0dDYE23XcCFIdgNSAmmGyXPBstOe0aAJXwJTxOEPn36VWr0PKIQJy5Y
4o1wpMpqCOIwWc8J9REV/REzN6Z1LXImdUgXIXOwrz56gKUJzPejtBQyIGj0mveX
Fu6q54beR89jDc+oABmOgg==
-----END CERTIFICATE-----
Or you can refer to CloudFlare Origin CA — RSA Root here .
Then save and wait at least 30 minutes and then try the website, if not, please wait longer.
[/acc]
[acc title="NGINX"]
First you save the Origin Certificate content to a file called certificate.pem and upload it to the server.
Next is to save the content of the Private key part to a file called cert_key.pem and upload it to the server.
You can now configure SSL for NGINX following this guide and modify the configuration in NGINX as follows:
MARKDOWN_HASH520c6525752fa0ebcf8237932c644833MARKDOWN_HASH: The path of the certificate.pem file created above.
MARKDOWN_HASH479d41ed584bbde74fdf7165d48fec6fMARKDOWN_HASH: The path of the file cert_key.pem created above.
Here is a partial SSL setup example on NGINX:
server {
listen 80;
listen 443;
ssl on;
ssl_certificate /path/to/certificate.pem;
ssl_certificate_key /path/to/cert_key.pem;
server_name your.domain.com;
access_log /var/log/nginx/nginx.vhost.access.log;
error_log /var/log/nginx/nginx.vhost.error.log;
location / {
root /home/www/public_html/your.domain.com/public/;
index index.html;
}
}
You can do the same on any operating system, regardless of the script (if you use it) because it is as simple as setting the path of the certificate files correctly.
Finally, restart NGINX.
service nginx restart
[/acc]
[acc title="Apache"]
First you save the Origin Certificate content to a file called certificate.pem and upload it to the server.
Next is to save the content of the Private key part to a file called cert_key.pem and upload it to the server.
Then configure SSL for Apache according to this guide , and modify the configuration as follows:
MARKDOWN_HASH06f8620ef84509dcf5dbbe2fdf02a1beMARKDOWN_HASH: path to the generated certificate.pem file.
MARKDOWN_HASHf1b49a6e324288dd2e33d0a4b0b24ea9MARKDOWN_HASH: Path to the generated cert_key.pem file.
Eg:
<VirtualHost 192.168.0.1:443>
DocumentRoot /var/www/html2
ServerName www.yourdomain.com
SSLEngine on
SSLCertificateFile /path/to/certificate.pem
SSLCertificateKeyFile /path/to/cert_key.pem
</VirtualHost>
Then restart Apache.
# CentOS/RHEL/Fedora
service httpd restart
# Ubuntu/Debian
service apache2 restart
[/acc]
[/accordion]
ENABLE SSL FOR WORDPRESS
After SSL has been activated, install the Really Simple SSL plugin to have WordPress redirect itself to HTTPS protocol. Also install the SSL Insecure Content Fixer plugin to automatically convert all links on the page to https to avoid white or yellow https errors.
EPILOGUE
So in this article, you know in detail how to install free SSL from CloudFlare through two types of Flexible SSL and Full SSL. If you find it difficult at any step, please comment and ask for more help.
- List of SWIFT/BIC codes of Vietnamese banks
- Payoneer supports off-net payments for other banks
- Receive money from Envato Market to Payoneer account, Get Facebook Verification Code when adding Payoneer card
- What to do when Payoneer Account is locked
- Instructions to receive money from ClickBank, Receive money from CJ Affiliate to Payoneer account