Instructions to restore Hosting data on JetBackup 5
Currently, JetBackup 5 has a stable 5.2 version, improving features and data backup speed, at DirectAdmin hosting and new cPanel hosting servers on TinoHost will all work with Jetbackup 5. Also for The servers are using JetBackup 4, we are also planning to migrate the upgrade to Jetbackup 5 for the sync to work.

Here is a guide to restore data using JetBackup 5 on TinoHost's hosting system. This guide is written on the cPanel hosting interface, but for DirectAdmin, the restore operations are similar.
By default, TinoHost supports data backup on hosting every day and stores up to 7 latest backups ( this is an extra support feature for service packages, you should actively backup your data at least one copy). every month for safety ). If you need to restore data to a previous backup, go to cPanel and navigate to the JetBackup 5 feature.
Instructions to restore all data on Hosting
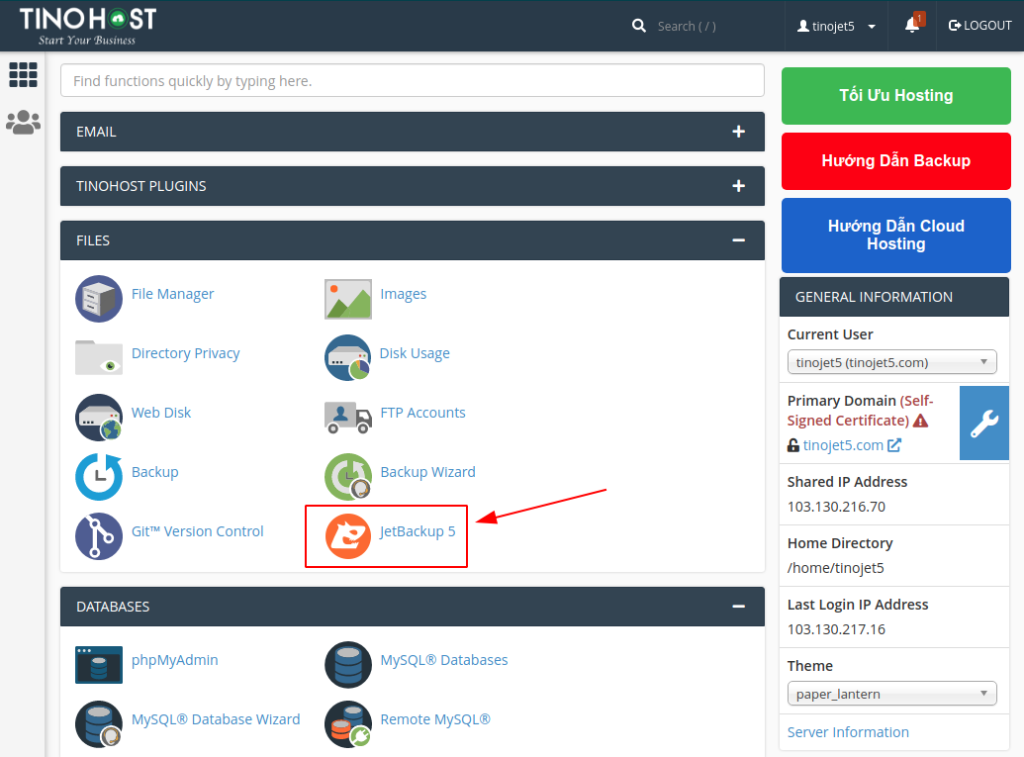
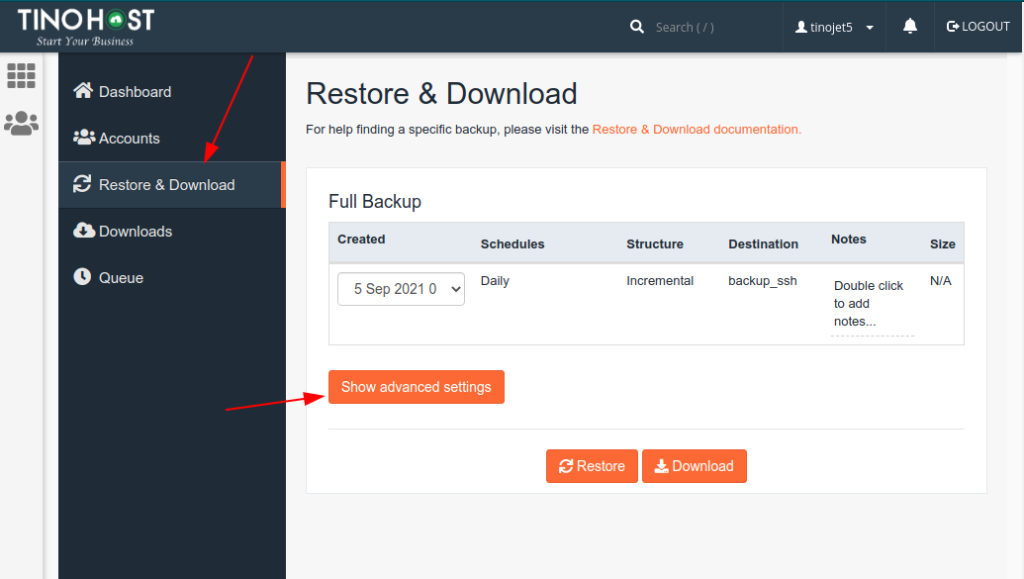
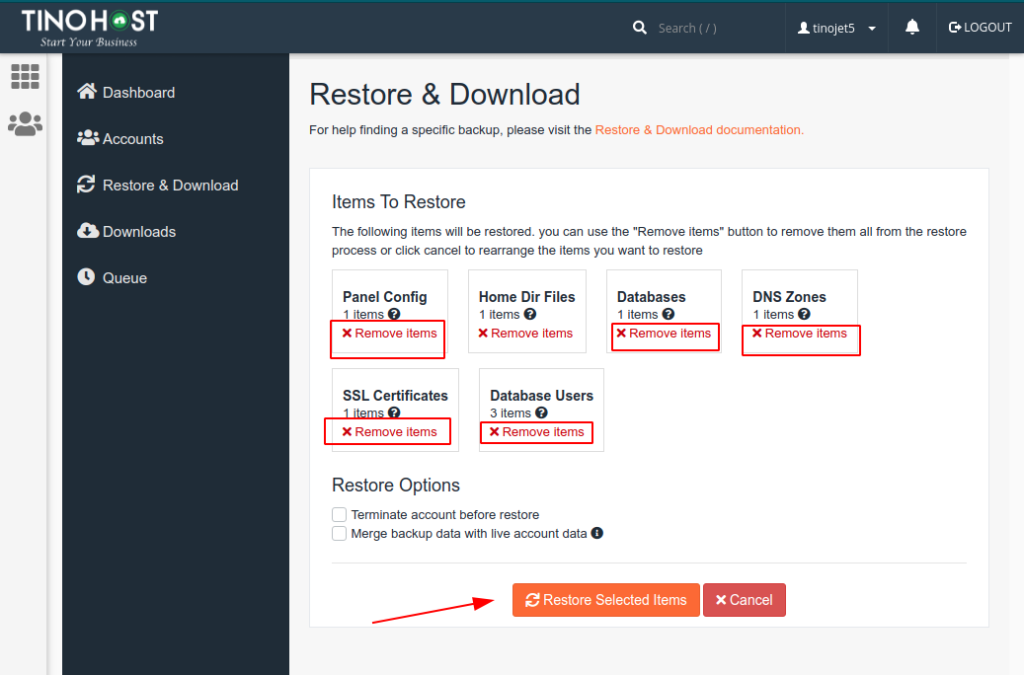
In the JetBackup window, access the "Restore & Download" section to select the backup you want to restore.
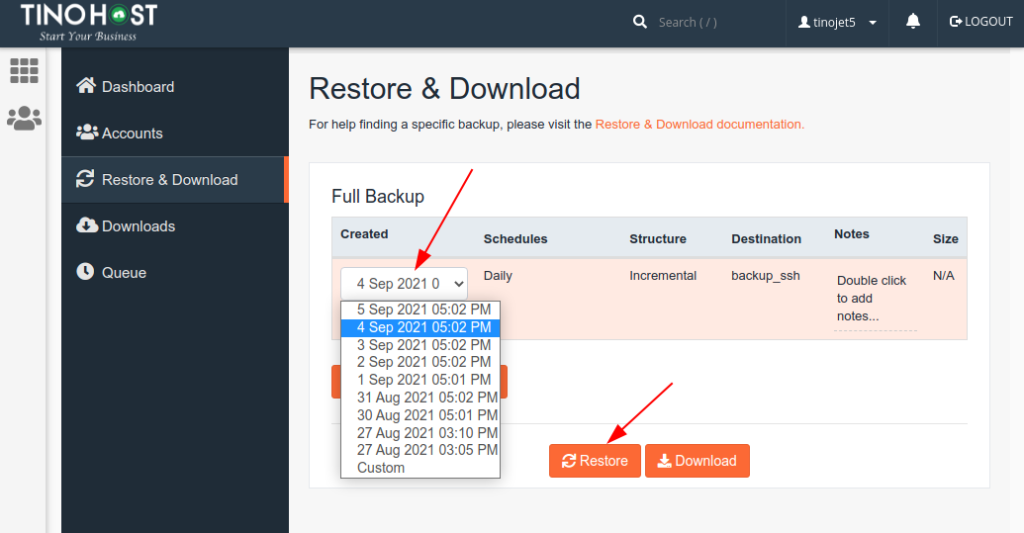
After selecting the backup and clicking "Restore", by default Jectbackup will display the parts where it will restore, here if we want to restore the entire hosting data, there is no need to adjust anything else, just select “Restore Selected Items” to start the restore.
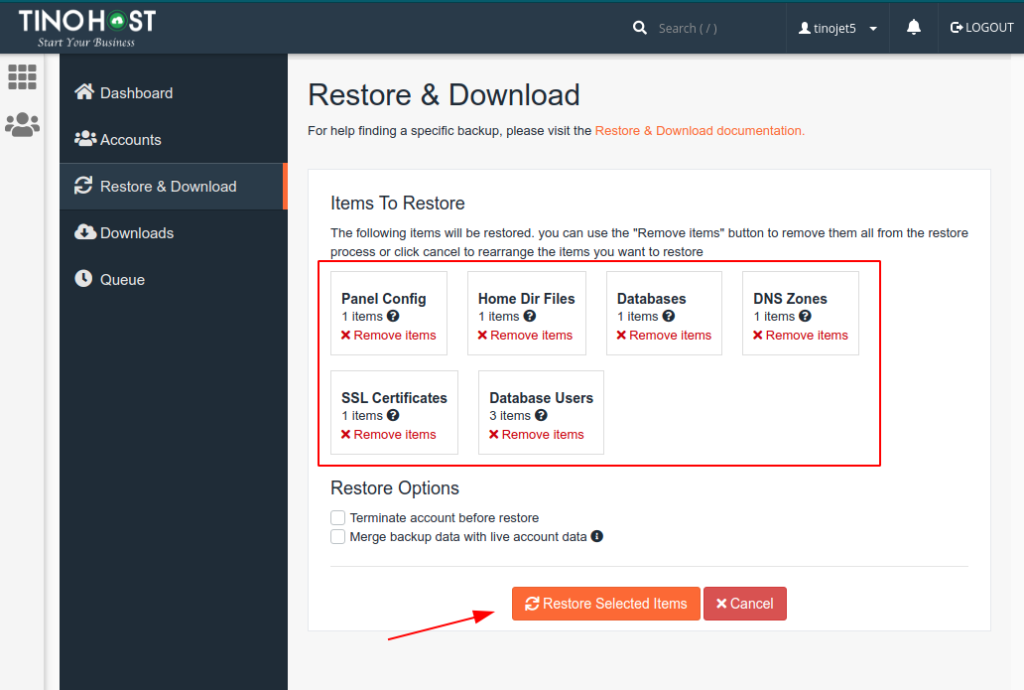
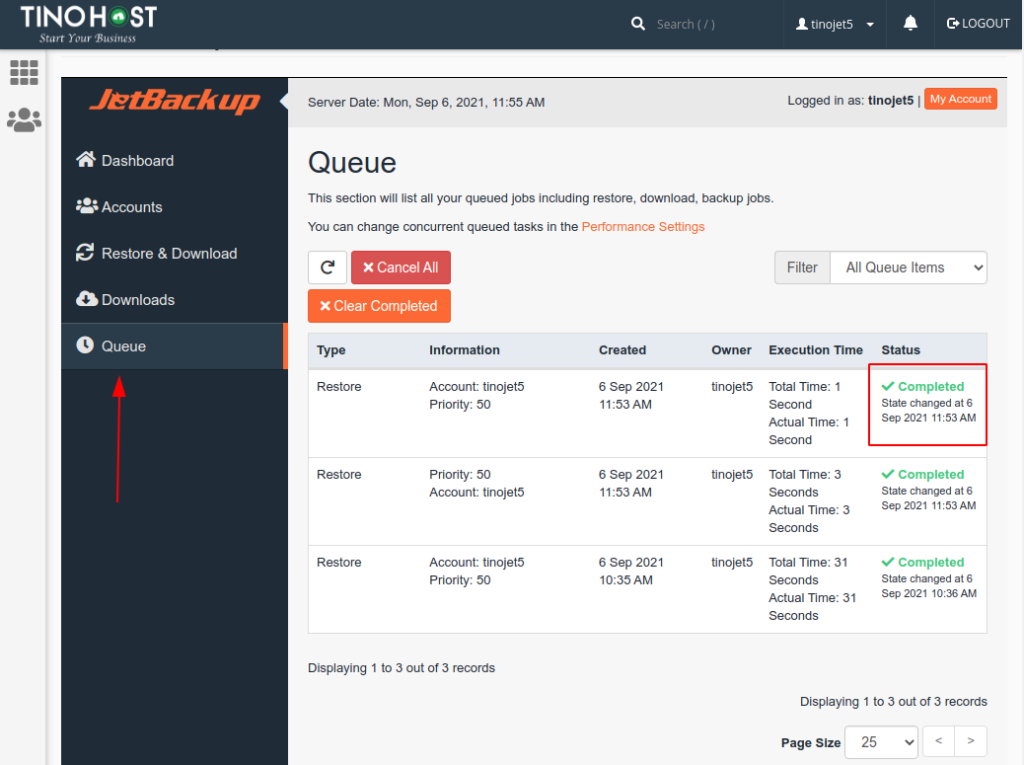
After you confirm the restore, the hosting will not be accessible during this restore because the system settings will be replaced with the old backup file, depending on the size of your data, the restore time will be different, usually We estimate that every 1GB of data will take an average of 1 minute to restore. After the Restore is complete, you can access the hosting again and move to JectBackup >> Queue to check if the restore has an error or is complete.
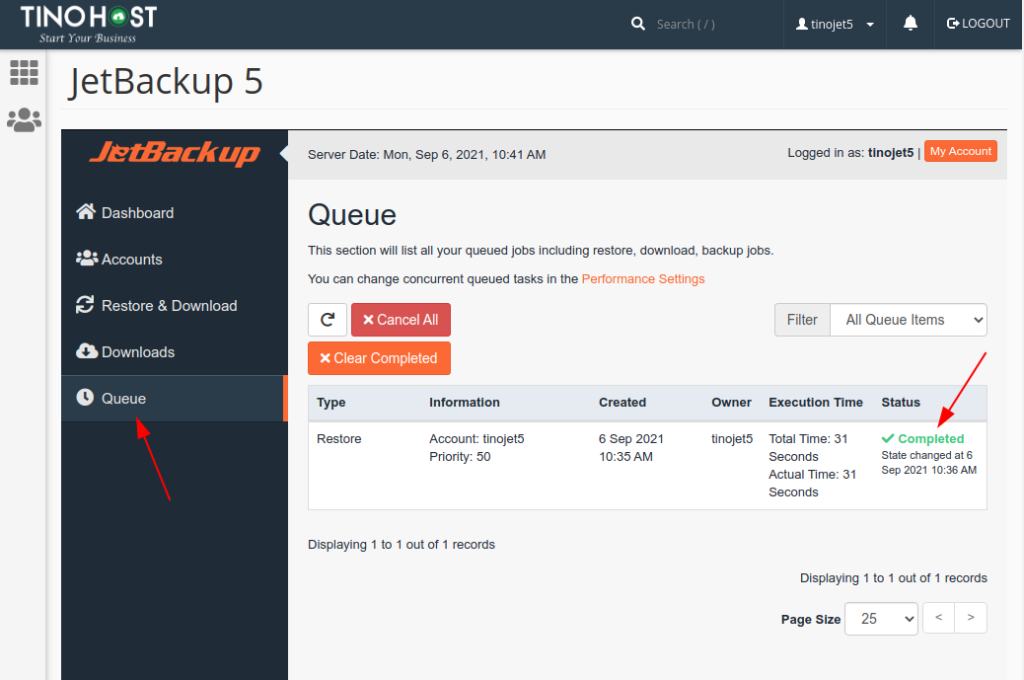
The above message means that the restore process is complete and there are no errors during the backup process, you can check the operation of the website after the backup.
Instructions to restore any File or Data Folder on Hosting
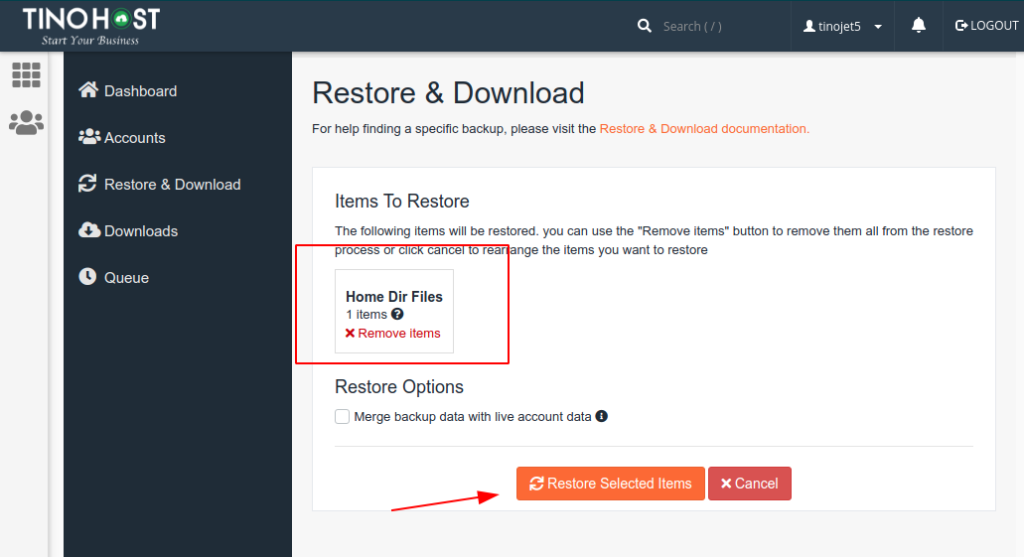
In case you just need to restore the specified files or folders but don't want to restore the entire hosting, the instructions below will help you. Go to JetBackup 5 >> “Restore & Download” and select “Show advance setting”
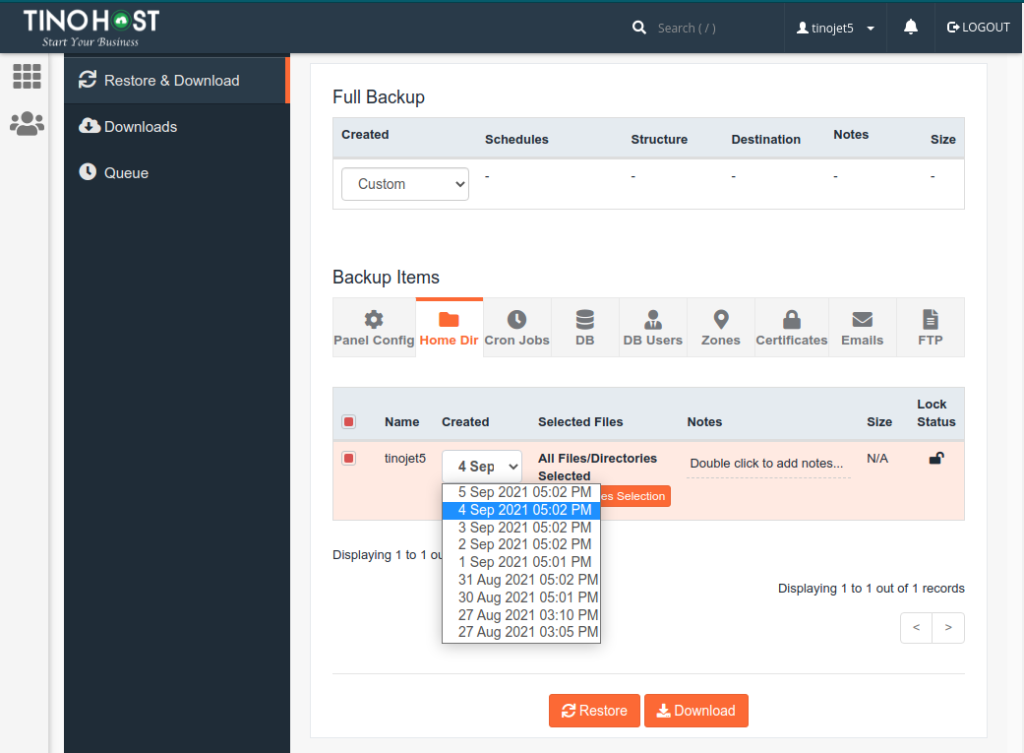
At the "Show advance setting" interface, move to the "Home Dir" tab.
In the “Home Dir” tab, select the desired backup
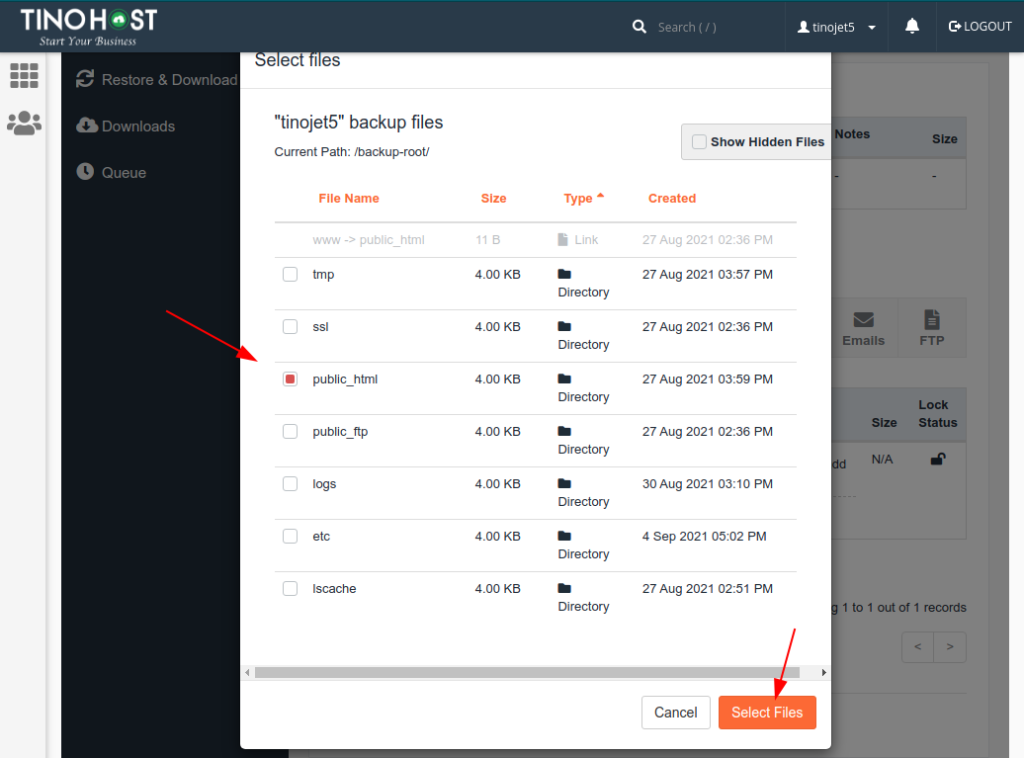
Then we select the files or folders we want to restore
After completing the selection, we click “Restore”
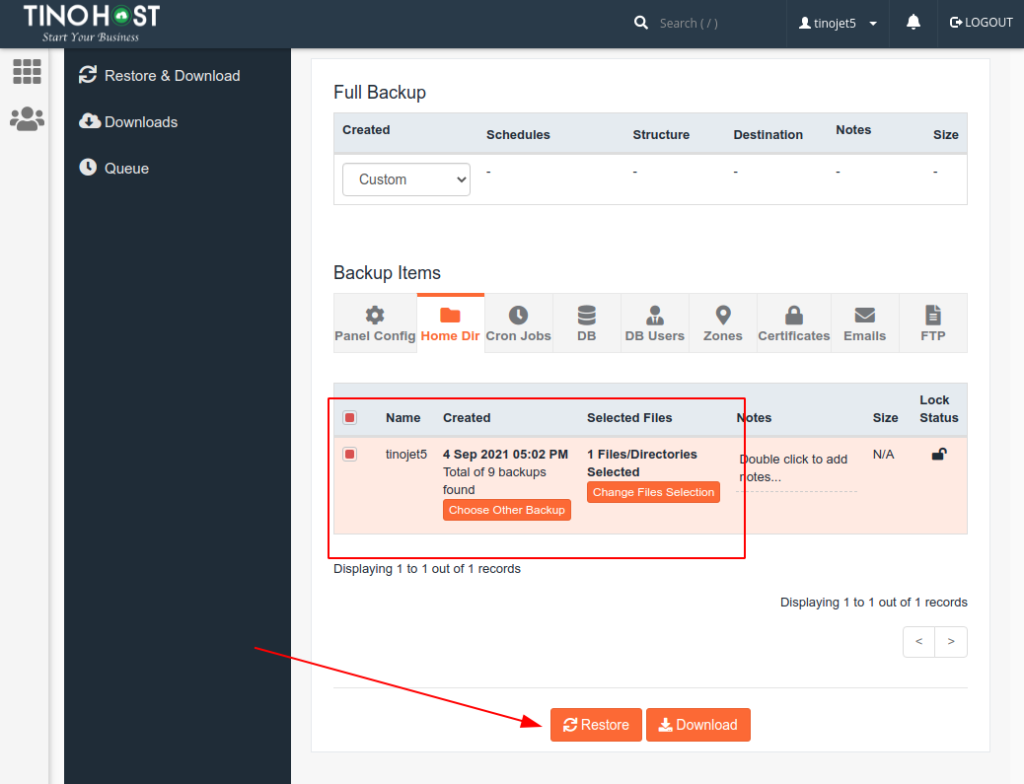
At the restore confirmation window, delete all default restore items displayed and leave only "Home Dir File"
Once done, click restore selected Items to do it
Then you can go to the Queue to monitor the restore process and check the website access after the restore is complete
- VPS runs ads Facebook Ads Google Bing Ads Instagram Ads Tiktok ads Twitter…
- Instructions to check the IP address connected to the VPS
- VPS with MMO(Make Money Online)
- Instructions to change the default access port (3389) on VPS
- Instructions to fix the error of not showing preview images on Windows VPS