[Multisite] Install WordPress Multisite on a server using VPSSIM
Currently, many Linux server users install VPSSIM to manage the server and run WordPress , so I will guide in detail how to install Multisite, configure subdomains and separate domains for sub-sites on Linux servers using VPSSIM. .
First, you need to have a Linux server with VPSSIM installed and have a WordPress website installed on it. About this, you can refer to VPSSIM's homepage or use the menu vpssim -> 1 -> 3 to set it up.
In this article, I will have the following domains, which of course must all point to the server IP:
azdigi.info – The main domain name of the website
azdigi-dns.com – Own domain name of sub-site dns.azdigi.info
azdigiweb.com – The domain name of the subsite web.azdigi.info
So when you follow the instructions, remember to change the name to your domain name correctly, don't copy it.
In addition, in the article, I use the nano tool to edit the file. So make sure you have nano installed on the server.
[bash] yum install nano -y[/bash]
SET UP WILDCARD DNS
For the sub-domain to work, in the DNS settings of the main domain, there must be an A record , the name * and the value pointing to the server's IP.

Activate Multisite
Just like the normal activation, we edit the wp-config.php file of the main website.
[bash]
nano /home/azdigi.info/public_html/wp-config.php
[/ bash]
Then insert the following below <?php:
define( ‘WP_ALLOW_MULTISITE’, true );
Press [textmarker color=”2B2B2B”]Ctrl + O[/textmarker] to save and [textmarker color=”2B2B2B”]Ctrl + X[/textmarker] to exit. I will not repeat this in the post.
Then login to [textmarker color=”1281FF”]wp-admin -> Tools -> Network Setup [/textmarker] and set up Multisite with sub-domain or sub-directory as you like.

And add the following to wp-config.php :
define(‘MULTISITE’, true);
define(‘SUBDOMAIN_INSTALL’, true);
define(‘DOMAIN_CURRENT_SITE’, ‘azdigi.info’);
define(‘PATH_CURRENT_SITE’, ‘/’);
define(‘SITE_ID_CURRENT_SITE’, 1);
define(‘BLOG_ID_CURRENT_SITE’, 1);
As for the .htaccess part you omitted, now let's edit the main domain configuration file on NGINX:
[bash]nano /etc/nginx/conf.d/azdigi.info.conf[/bash]
Find the section:
server_name azdigi.info;
Replace to:
server_name azdigi.info *.azdigi.info;
Save and restart NGINX:
service nginx restart
Ok complete the installation.
Now you can access the WordPress admin page and create a subsite as instructed here .
USE YOUR OWN DOMAIN NAME FOR YOUR SUB-SITE ON VPSSIM
If you want to add a domain name as a separate domain name for a subsite, you must set up NGINX's VirtualHost to point that domain to the same directory. Those domains will first need to point to the VPS's IP, then you edit the website's main domain configuration file on NGINX:
[bash]nano /etc/nginx/conf.d/azdigi.info.conf[/bash]
Find the section:
server_name azdigi.info *.azdigi.info;
Replace to:
server_name azdigi.info *.azdigi.info azdigi-dns.com azdigiweb.com;
In which azdigi-dns.com and azdigiweb.com are the domain names I need to use for my child website. And don't forget to restart NGINX:
service nginx restart
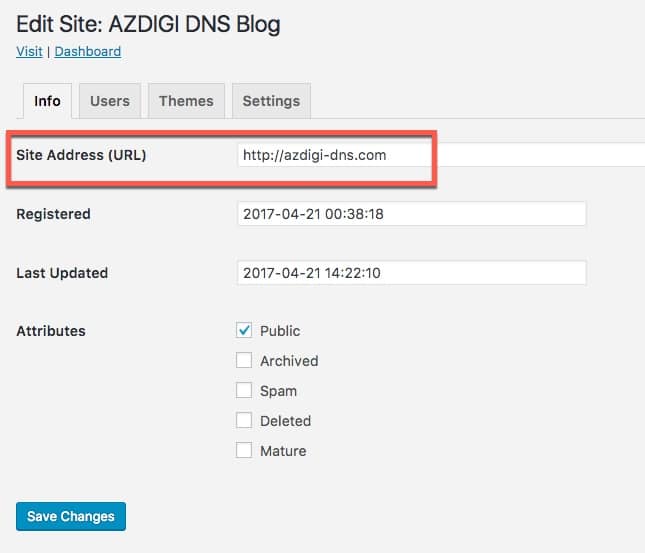
You can now configure your own domain name by changing the subsite's domain to the main domain and editing the wp-config.php file like this one .
Complete installation.
Very easy, right?